Cooling Demand (for iPad)
Add Calculation to a Project
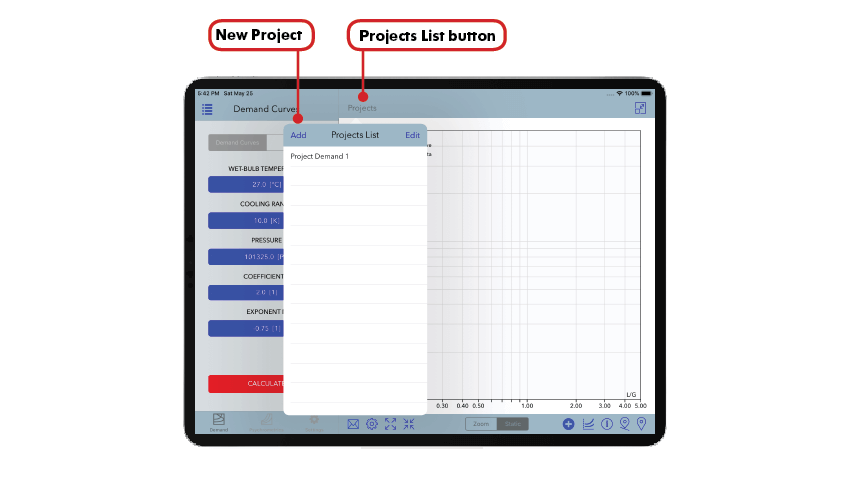
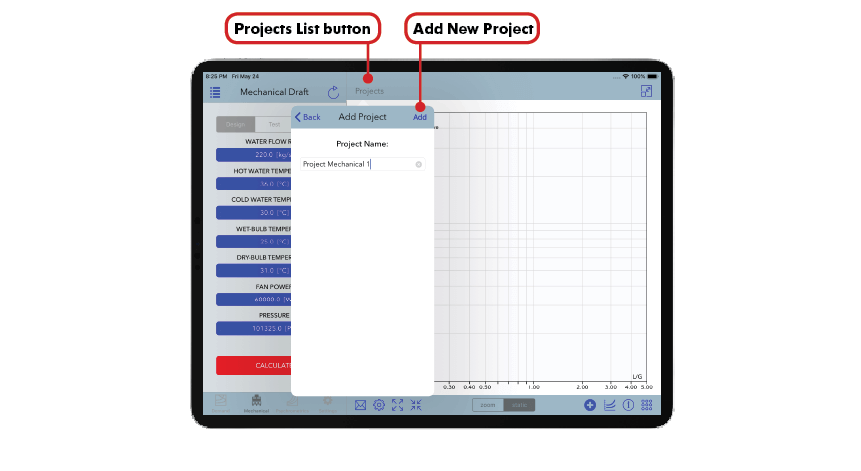
- Tap on the Projects button to add a new project (Figure 1).
- Tap the Add button on the Projects List popup and enter an identifier for a new project.
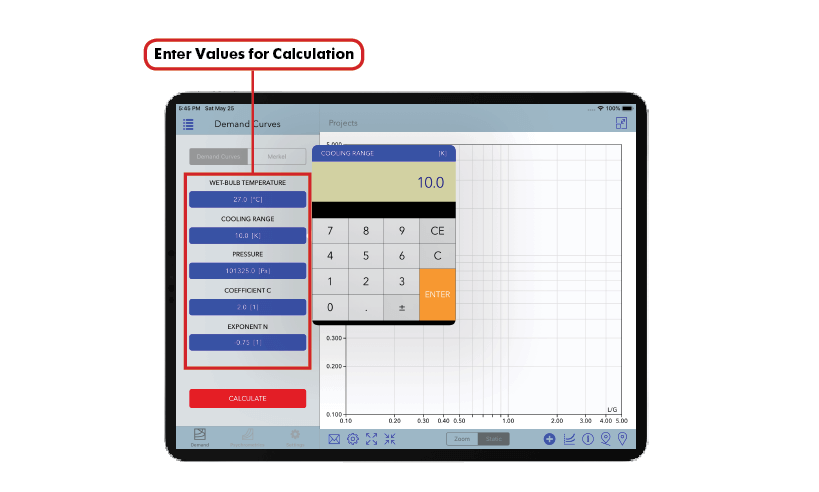
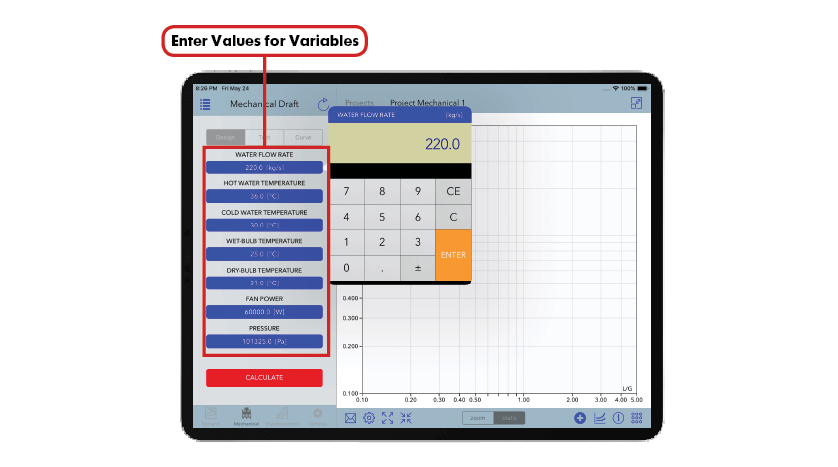
- Tap on the input variables to introduce the desired values for the calculation (Figure 2).
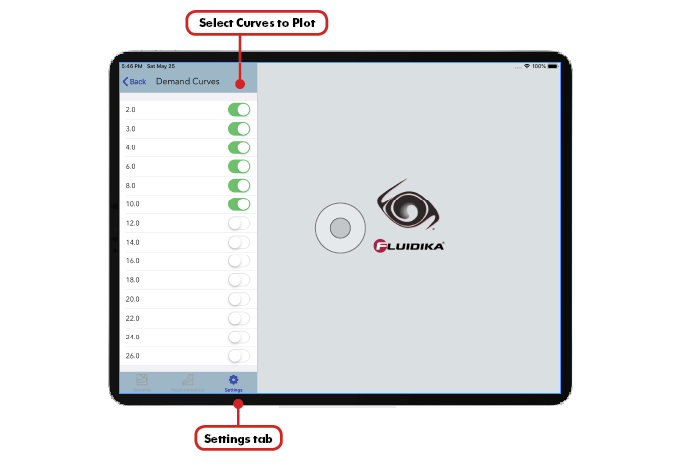
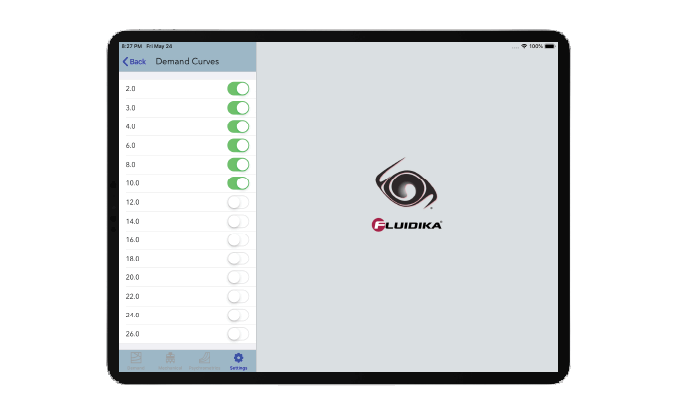
- Select the Approach Curves category for Demand Curves in the Settings tab to determine isolines that will be calculated and plotted in the current project (Figure 3).
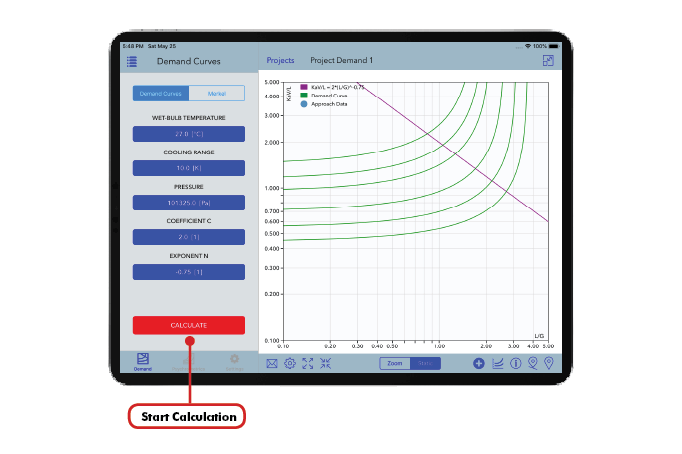
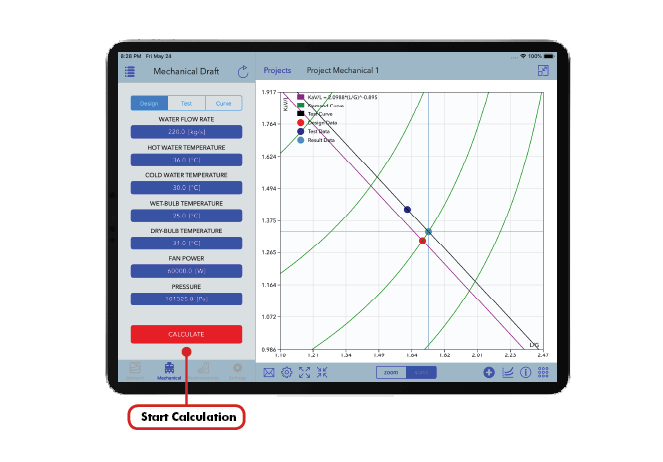
- Tap on the CALCULATE button to start the calculation (Figure 4).
Cooling Tower (for iPad)
Add Calculation to a Project
- Tap on the Projects button to add a new project (Figure 1).
- Tap the Add button on the Projects List popup and enter an identifier for a new project.
- Tap on the input variables to introduce the desired values for the design data, test data, characteristic curve, design L/G and tower type (Figure 2).
- Select the Approach Curves category for Mechanical Draft in the Settings tab to determine the values for the demand curves that will be calculated and plotted in the current project (Figure 3).
- Tap on the CALCULATE button to start the calculation. Once the calculations has finished, additinal test data can be added to that project. (Figure 4).
CT-Mechanical
Installation
Double-click on the installation file and follow the on-screen instructions. When prompted, introduce the License Key that was delivered to you. Contact support@fluidika.com if you require assistance.
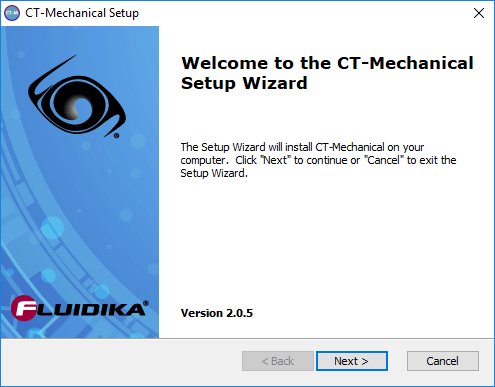
Please note that you need to have Administrator privileges on your computer in order to install this software.
License Activation
Activation via Internet is required in order to unlock and use all the capabilities of CT-Mechanical. Once you have a valid Internet connection, the procedure to activate the license is as follows:
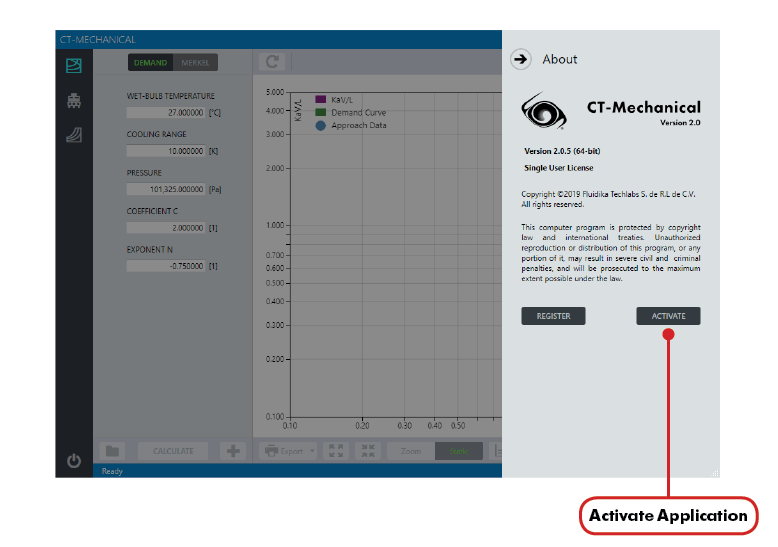
- Click on the About button located on the upper right hand side of the application. This will bring the about screen of CT-Mechanical (Figure 2).
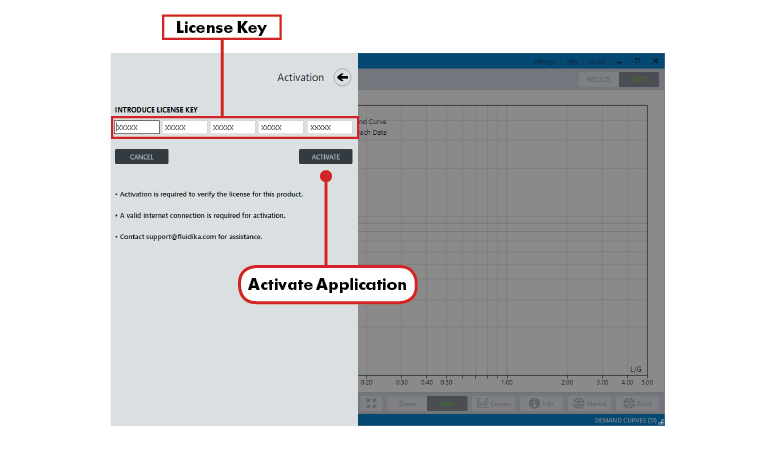
- Click on the ACTIVATE button to start the activation process. The activation screen of CT-Mechanical appears on the left hand side of the application’s window (Figure 3).
- Introduce the License Key that was provided to you to install the application. Once all the fields of the license key are validated, click on the ACTIVATE button of the activation screen.
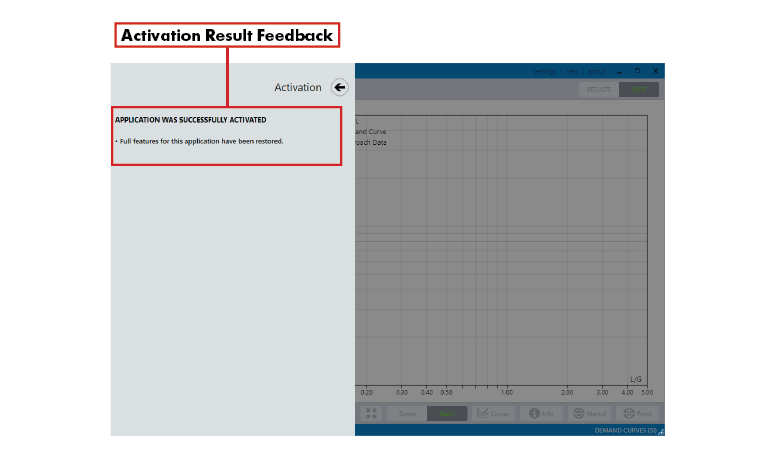
- If the activation was successful (Figure 4), a screen indicating that the applications was activated will be displayed.
CT-Natural
Installation
Double-click on the installation file and follow the on-screen instructions. When prompted, introduce the License Key that was delivered to you. Contact support@fluidika.com if you require assistance.

Please note that you need to have Administrator privileges on your computer in order to install this software.
License Activation
Activation via Internet is required in order to unlock and use all the capabilities of CT-Natural. Once you have a valid Internet connection, the procedure to activate the license is as follows:
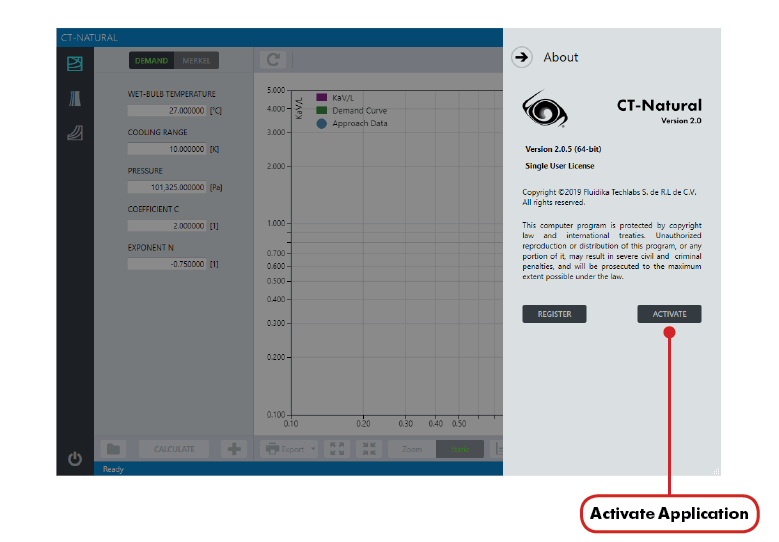
- Click on the About button located on the upper right hand side of the application. This will bring the about screen of CT-Natural (Figure 2).
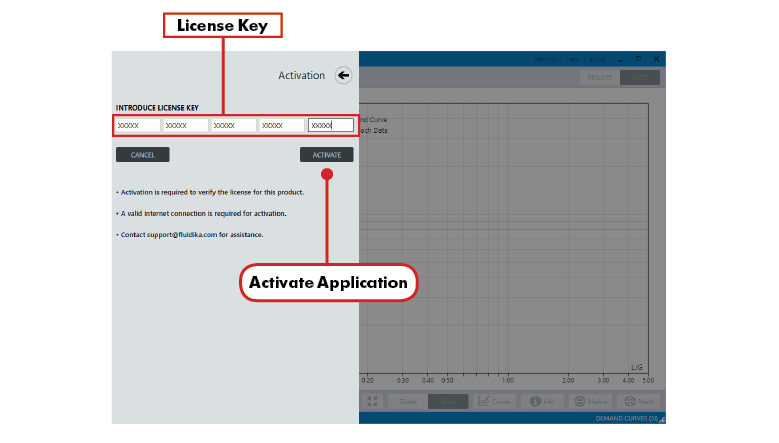
- Click on the ACTIVATE button to start the activation process. The activation screen of CT-Natural appears on the left hand side of the application’s window (Figure 3).
- Introduce the License Key that was provided to you to install the application. Once all the fields of the license key are validated, click on the ACTIVATE button of the activation screen.
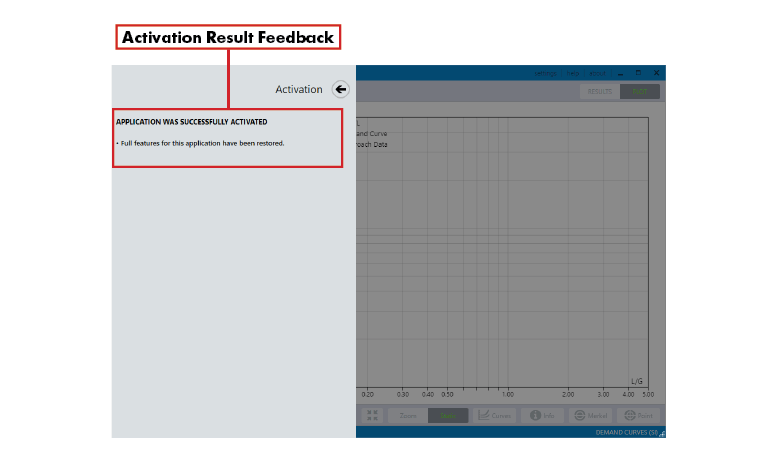
- If the activation was successful (Figure 4), a screen indicating that the applications was activated will be displayed.
Excel Add-in
Activate/Deactivate an add-in Excel
To activate an Excel add-in
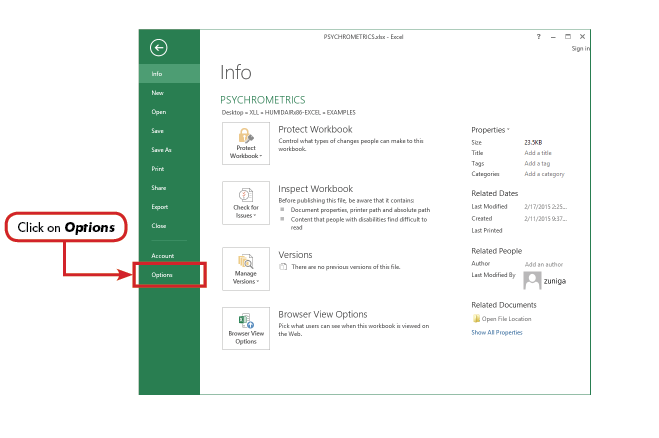
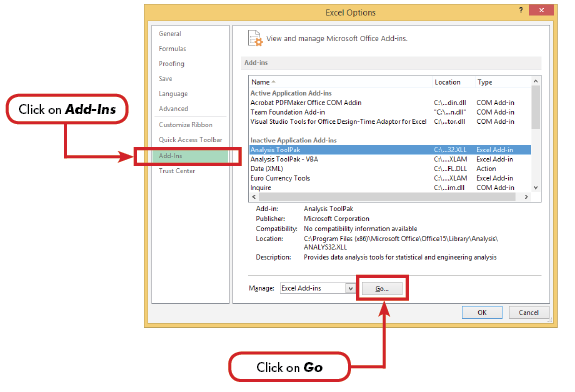
- Click the File tab, click Options (Excel Options in Excel 2013), and then click the Add-Ins category.
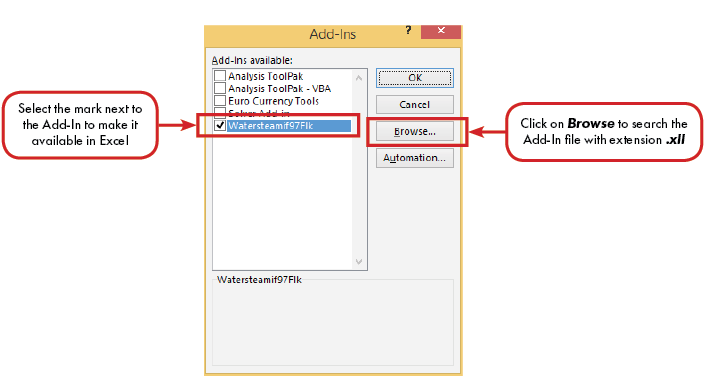
- In the Manage box, click Excel Add-ins, and then click Go. The Add-Ins dialog box appears.
- In the Add-Ins available box, select the check box next to the add-in that you want to activate, and then click OK.
To deactivate an Excel add-in
1. Click the File tab, click Options (Excel Options in Excel 2013), and then click the Add-Ins category.
2. In the Manage box, click Excel Add-ins, and then click Go. The Add-Ins dialog box appears.
3. In the Add-Ins available box, clear the check box next to the add-in that you want to inactivate, and then click OK.
Notice
This website or its third-party tools use cookies, which are necessary to its functioning and required to achieve the purposes illustrated in the cookie policy. By closing this banner, scrolling this page, clicking a link or continuing to browse otherwise, you agree to the use of cookies. Please refer to our Cookie Policy, revised Privacy Policy and Terms and Conditions.
